DIY | Rope Inspired Decor

Sharing a simple inexpensive way to add a personal touch to your space! You will need styrofoam balls (less than $5 at Walmart), glue gun & glue sticks and rope:

20140110-091203.jpg20140110-091210.jpg20140110-091218.jpg

Simply wrap the rope around the object applying hot glue often. Remember, a little glue goes a long way.

End results:

20140110-091405.jpg20140110-091421.jpg

You can even think outside the box and add the new decor to seashells like I did here:

20140110-091542.jpg

The possibilities are endless with this DIY. You can cover vases, bowls, lamps–the sky is the limit.

Until next time…

carmen

DIY | Customized home decor

Today I’m featuring the color scheme through out my apartment: pale jade and mustard yellow.

I’m working on a (close to three-month) major apartment clean and will either toss, reduce or donate a lot of junk I’ve collected over the past few years. Today, I did some recycling and wanted to share some of my new pieces.

20131129-135618.jpg

20131129-135641.jpg

20131129-135704.jpg

20131129-135720.jpg

Wood, vases from Michael’s, Ferrero Rocher (chocolate treats), and an old iPhone case revamped with decoupage (using scrapbook papers, matte finish mod podge glue, tacky glue and paint). And here you have it folks! (I made the throw pillows and serving tray earlier this year)…

20131129-140417.jpg

20131129-140430.jpg

Most of these pieces will be placed in my home office once I’m done completing it. Looking forward to more DIY’s in the very near future.

Until next time…

carmen

DIY | Tree decor to die for

Greetings dolls!

I had the pleasure of turning something old into sometime super fun and brand new. Tree trunks spray painted to use in the home as props. The project pretty self-explanatory and easy to follow through pics below.

20131121-110848.jpg

20131121-110900.jpg

I found the top two images via google– since I didn’t take before and during pics. The sky is the limit with the color paint you can use for this projects. Here is the big reveal:

20131121-110917.jpg

Until next time,

carmen

Home + living | DIY Home office Pt 1

Greetings all,

This project has been planned in my head for quite a while now. I decided to turn my laundry room into my home office.

Here is the start of the office with a desk and accent stand I painted my fav shade of green (Jade).

20130329-121040.jpg

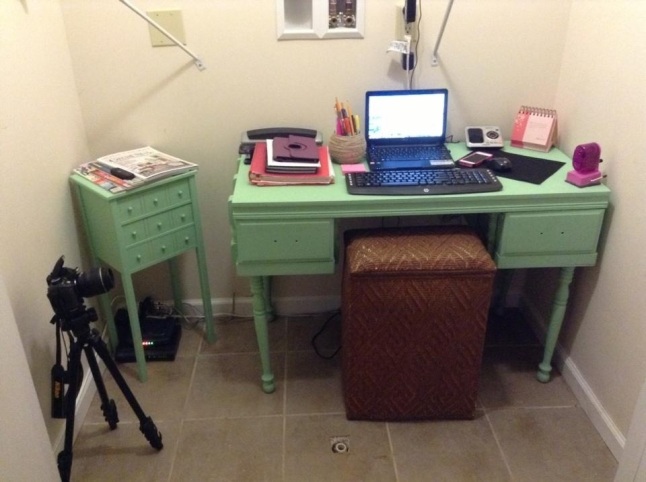
The project itself is far from over (shelving units, wall art, custom painted rug etc.) but I’ve started with a few essentials.

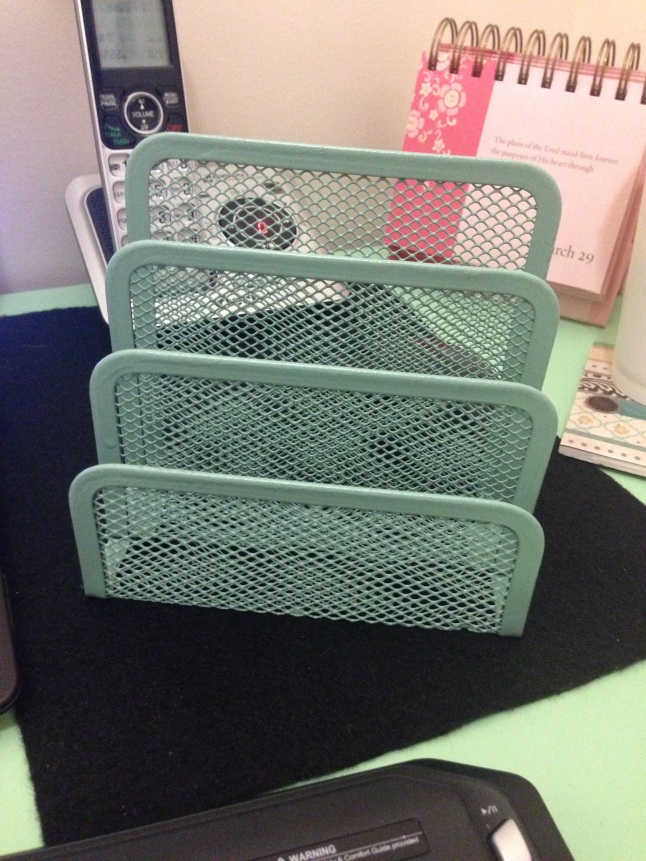
First is this file organizer I spray painted

20130329-122204.jpg

And of course a coaster to protect my desk from liquid spills

20130329-122338.jpg

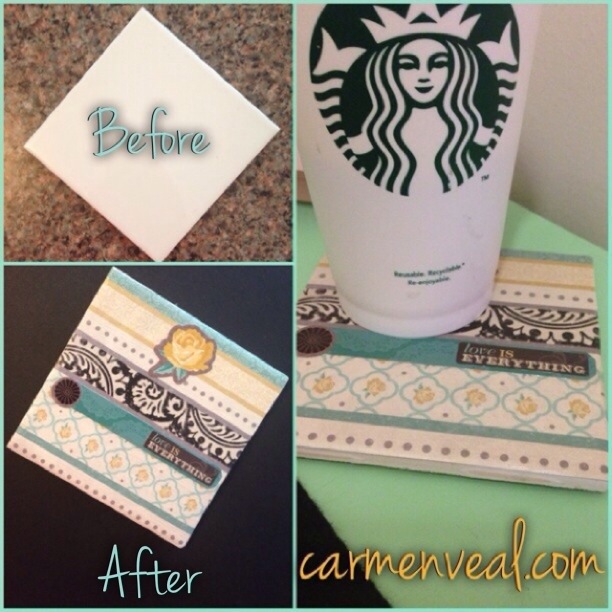
Here is how I made it:

20130329-123458.jpg
1. Buy the precut square tile from Home Depot
2. Cut the paper the size of your tile. I used a rotary cutter & pad. Lined the tile to the edge of the paper for a perfect square.
3. Use mod pudge glue and foam brush to apply scrapbook paper. I used one coat on top of the tile…
4. Applied cut paper, then applied another coat of mod podge glue to the top.

20130329-123910.jpg
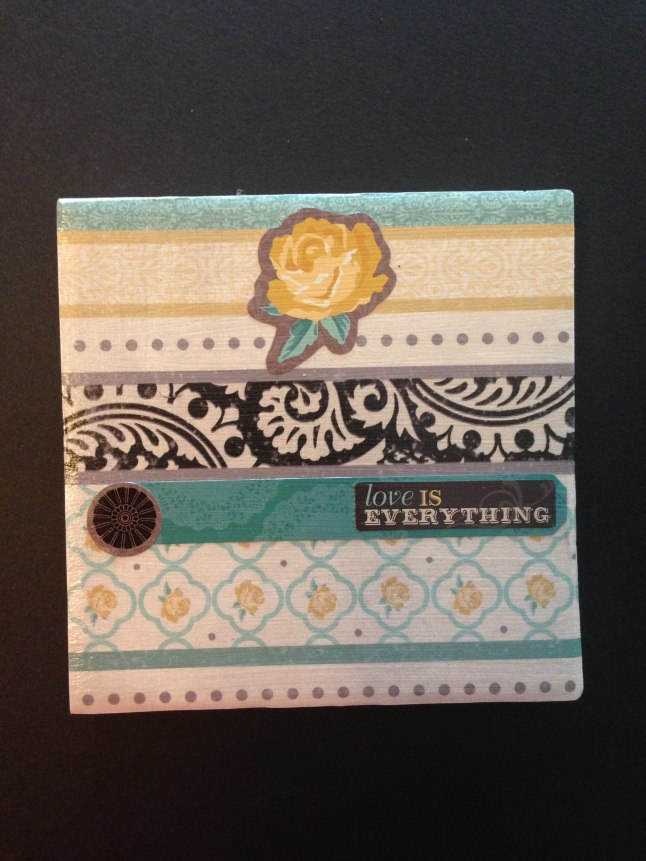
5. (Optional) I decided to add a few decals from the scrapbook set. Then applied one more coat of mod podge and let dry.

I hope you guys enjoyed and use this to make your own. All products were purchased from Walmart (long ago since I’m using things I already have in my home). Stay tuned for part 2.

Until next time…

XO,
Carmen Veal

DIY tie dye birthday cake

Today is a special day in my home. It’s my daughters 10th birthday. I’m literally a crazy person with a lot to do this week and can’t celebrate until this weekend. I still had to do something special, so we made a tie dye birthday cake. Keep in mind I’m a health freak (seriously I have zero sweets in my pantry), so this is a treat for us all.

20130318-184536.jpg

I used white cake mix separated into bowls and food coloring for color.

20130318-185202.jpg

20130318-184940.jpg

20130318-184956.jpg

20130318-185118.jpg

20130318-185405.jpg

Update: sorry for the very few details provided.
I use two boxes of cake mix and followed the box for instructions for baking. Be sure to use a different spoon/fork to mix each color to avoid mixing and messing up colors. Also, it will work best if your cake is flat, the last image shows the cake with the top cut so its flat. Only apply icing to cake that is cool or else it’ll break apart (if short on time or impatient like I was, put cake right into the freezer for about 30 minutes).

And here is the masterpiece collage

20130318-185843.jpg